Zentangle Hands

Students in 6th grade classes were introduced to the popular contemporary art of Zentangle.. Students learned about the history and development Zentangle Art. Students looked at different examples of Zentangle patterns. Students will trace their hand 4 - 5 times to fill and balance the page. They will work to develop their own unique Zentangle patterns by using different lines and shapes to create a variety of values. Then each overlapping section of the hands will be filled with unique Zentangle patterns. One color will be added to create emphasis and add variety. Look at the Power Point below to review what we learned about Zentangle in class.
Option 1 Power Point Review: After reviewing the power point, answer the Essential Question (E.Q.) in a complete paragraph. "How can I use line, shape, and color to create unique Zentangle patterns." Give specific examples in your paragraph and work to use art vocabulary. You may write your response on loose leaf or type it and email it to Mrs. Wine at ewine@schools.nyc.gov Make sure your response included your name and class.
Option 2 Drawing Hands in a Realistic Style: Look at the realistic hand drawing project inspired by the artist M.C. Escher that the other 6th grade class is doing. Look at the Power Point. Draw your best realistic hand using pencil. Draw on plain white copy paper or drawing paper. Work to include details and use shading to show shadow and create a sense of realism. Place your name and class on the back of your drawing and submit it to Mrs. Wine for extra credit.

Option 3 Try Zentangle with a Different Subject: Some third grade classes are also studying the art of Zentangle. Go to the third grade tab and look at the Power Points and the extra credit options for the third grade Zentangle project. Create a Zentangle artwork that is either a landscape (like the third graders are doing) or choose one of their options for extra credit for the Zentangle project. Draw on white copy paper, drawing paper, or construction paper. Place your name and class number on the back of the drawing and submit it to Mrs. Wine for extra credit.


PREVIOUS YEARS:
Matisse Inspired Collages
Class 6-413

Hello Families!! This page will have the same activities I posted on my Google classroom page in addition to descriptions of activities we would have actually done in art class. I will post a new activity each week, but there will be extra "enrichment" ideas below as well. If you have any questions, please reach out to me via my school email at ewine@schools.nyc.gov
Week of April 6: This week you will draw a plan for your final Matisse inspired artwork. Think about what you have learned about the placement of shapes from "Picture This." Think about how Matisse used shapes to create a theme in his work. Will you create a garden? An ocean? A forest? A circus? You have endless possibilities.
1.. Look at this Power Point of other students who were inspired by Matisse.
2. Think about how you can use basic shapes to express your ideas. Consider repeating these shapes to create a strong theme.
3. Draw your ideas on your paper. Work to fill your page. DO NOT ADD COLOR!
4. Take a photo of your work and email it to me for feedback. We will finish the work next week. Email me at ellen.wine@ps150q.org
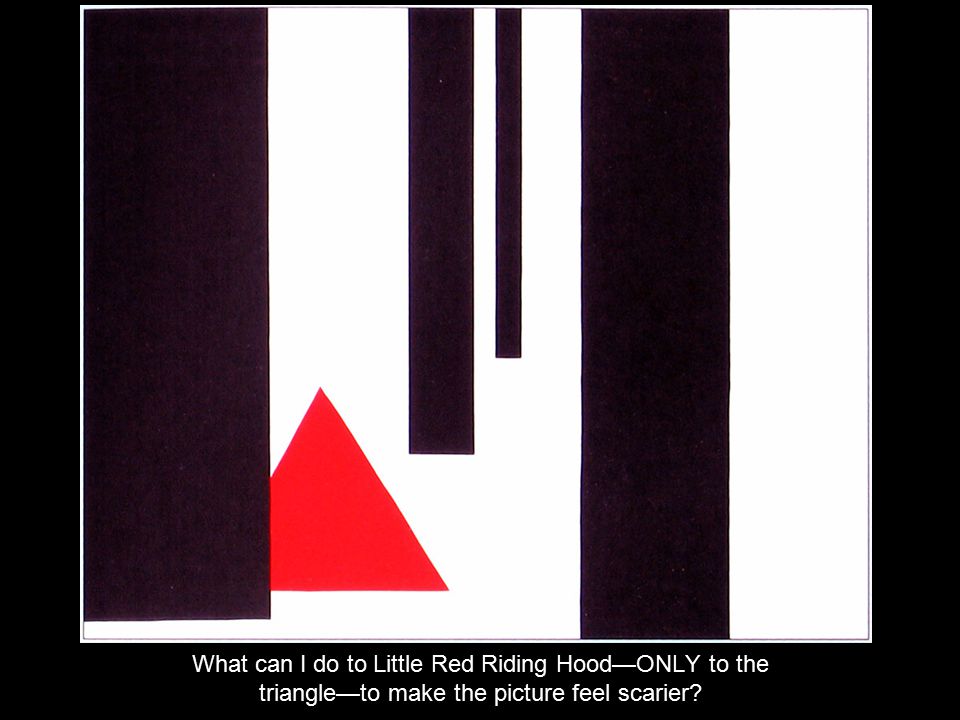
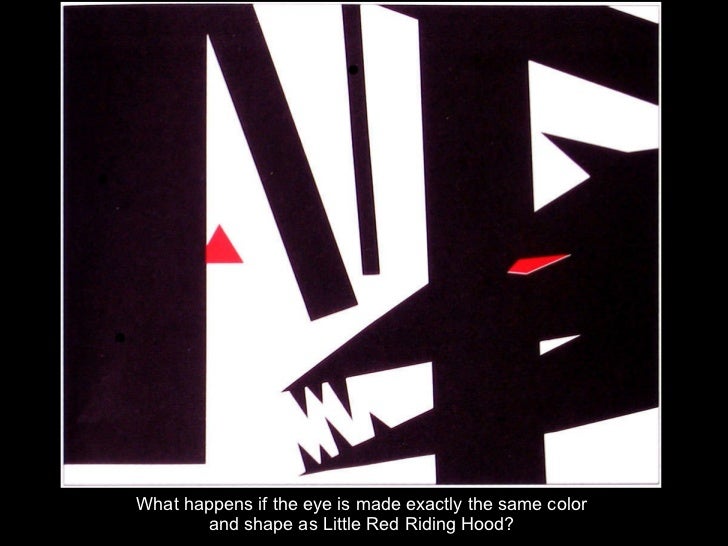
Week of March 30: Create a simple illustration of your favorite fairy tale based on the concepts you learned in Picture This.
1. Review the concepts of Picture This in the Power Point. See how other students illustrated these concepts in simple collages of their own.
2. Create a simple illustration of your favorite fairy tale using what you learned in Picture This. Use simple shapes and limited colors (black and white plus one color) to create your illustration You may draw with any material you want, create a collage, or even try using a digital app or program. Email a photo of your work to Mrs. Wine at ewine@schools.nyc.gov
Week of March 23: Review what we learned in class about design concepts in collage and about the French artist Henri Matisse.
1. Read the Henri Matisse collage handout and look at the pictures and information on the Power Point.
Write a paragraph to explain what you know about Henri Matisse and his paper cut-outs. You may type your paragraph on Google Docs and share with Mrs. Wine. Or you may write your paragraph on loose leaf. Take a photo of your paragraph on loose leaf (with a smartphone) and email to Mrs. Wine at ewine@schools.nyc.gov
In Class Activities and Enrichment:
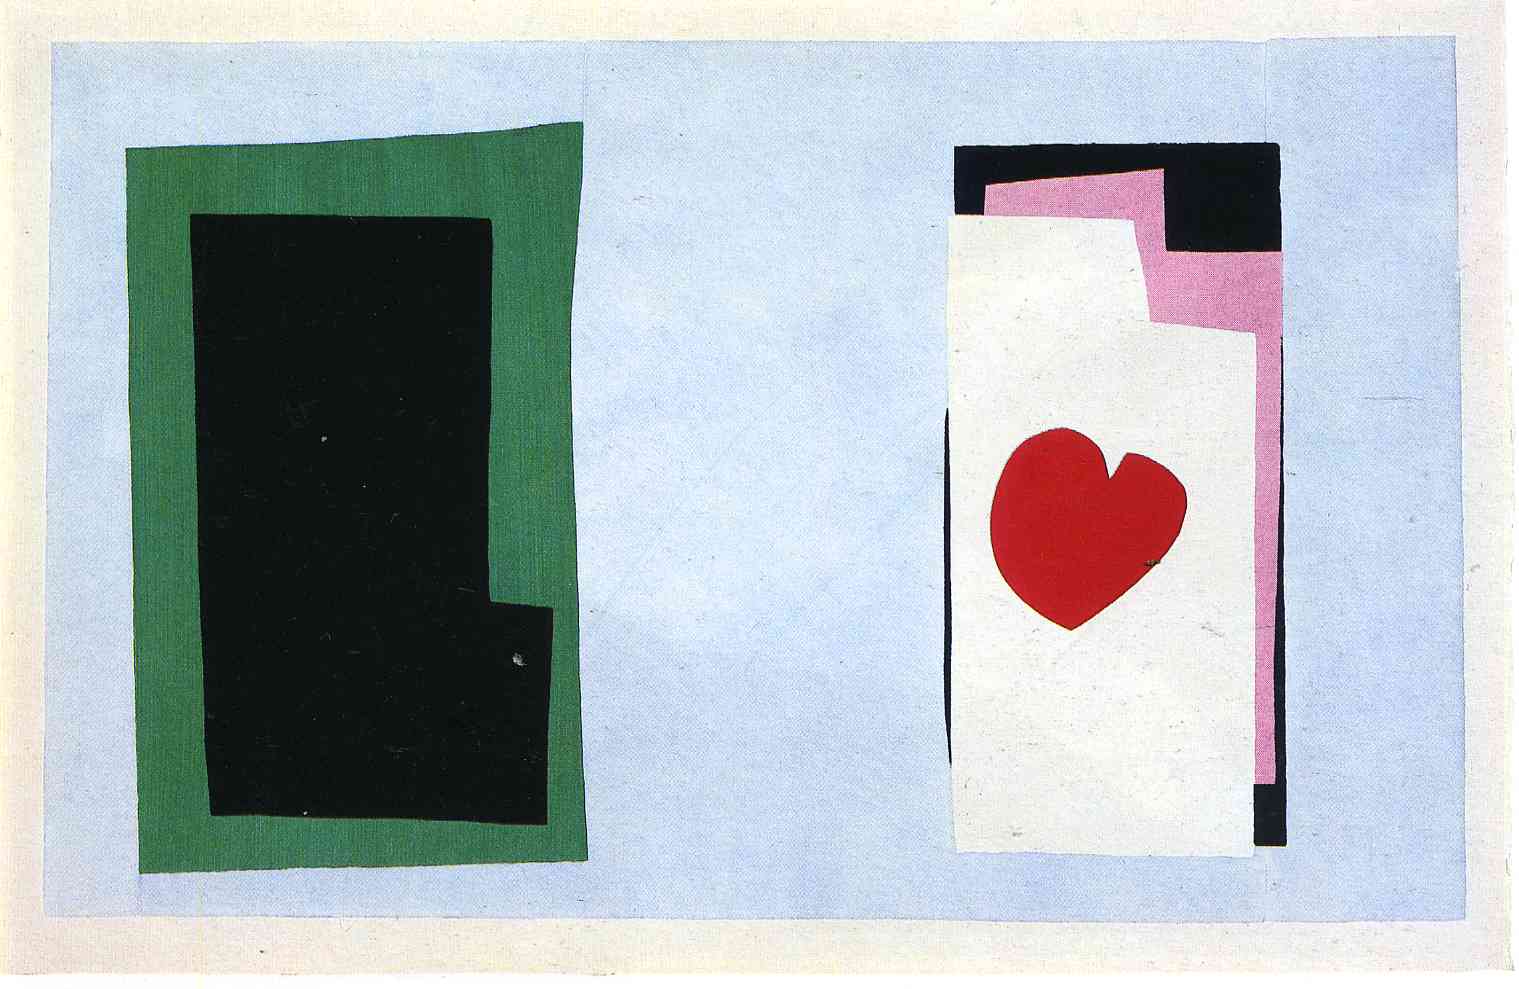
Sixth grade students in class 6-413 are creating collages inspired by French artist Henri Matisse. Matisse was a French painter known for his bold and wild use of colors. In his older years, as his health began to fail, he turned to the art of collage.
Students looked at illustrations from Picture This and learned how basic design concepts can communicate a mood or message in collage. Students created a black and white torn paper collage and a second collage using black, white, and one additional color to explore these concepts. Review these concepts in the Power Point below.
Students read about the life of Matisse and examined his works. Students created a quick collage inspired by The Heart (1943). Students will be creating a five color collage using the theme and colors of their choice. Look below to find opportunities for extra credit and enrichment.
Home Link Option 1: View Class Power Point:
Sit together as a family and look at this power point. Students should be able to explain terms such as organic, geometric, positive space and negative space shapes. Answer one of the questions from the presentation in a complete paragraph. Place your name and class on top of the sheet with the paragraph and submit it to Mrs. Wine in class. OR....you may type your answer and send it to Mrs. Wine at ewine@schools.nyc.gov. Make sure to include your name and class on emailed response.

Home Link Option 2: View Student Examples and Sketch:
Review the power point we viewed in class. What ideas do you see that you like? How could you borrow from some of these ideas? How could you change them to make them your own? How can you improve these ideas to make them even better?
Create a sketch or practice collage at home. Make sure you meet all of the project criteria outlined on the Power Point. Add color with crayon, marker, or colored pencil. Bring this sketch or practice collage in and use it as you are working.
Matisse Student Examples
Home Line Option 3: Watch this YouTube video (under 7 minutes) about the exhibition Matisse's Cut Outs that was at the Museum of Modern Art here in NYC a few years ago.
Respond to this video in any way you choose. You could give a detailed written explanation about one of the works highlighted in the video. You could write a poem about his cut outs. You could create your own collage, drawing, or painting inspired by some of the works from this exhibition. Bring your response to Mrs. Wine in class. Or you could take a photo (with a smartphone) and email it to her at ewine@schools.nyc.gov
Week of March 23: Review what we learned in class about design concepts in collage and about the French artist Henri Matisse.
Sit together as a family and look at this power point. Students should be able to explain terms such as organic, geometric, positive space and negative space shapes. Answer one of the questions from the presentation in a complete paragraph. Place your name and class on top of the sheet with the paragraph and submit it to Mrs. Wine in class. OR....you may type your answer and send it to Mrs. Wine at ewine@schools.nyc.gov. Make sure to include your name and class on emailed response.
Home Link Option 2: View Student Examples and Sketch:
Review the power point we viewed in class. What ideas do you see that you like? How could you borrow from some of these ideas? How could you change them to make them your own? How can you improve these ideas to make them even better?
Create a sketch or practice collage at home. Make sure you meet all of the project criteria outlined on the Power Point. Add color with crayon, marker, or colored pencil. Bring this sketch or practice collage in and use it as you are working.
Matisse Student Examples
Home Line Option 3: Watch this YouTube video (under 7 minutes) about the exhibition Matisse's Cut Outs that was at the Museum of Modern Art here in NYC a few years ago.
Respond to this video in any way you choose. You could give a detailed written explanation about one of the works highlighted in the video. You could write a poem about his cut outs. You could create your own collage, drawing, or painting inspired by some of the works from this exhibition. Bring your response to Mrs. Wine in class. Or you could take a photo (with a smartphone) and email it to her at ewine@schools.nyc.gov
Home Line Option 3: Watch this YouTube video (under 7 minutes) about the exhibition Matisse's Cut Outs that was at the Museum of Modern Art here in NYC a few years ago.
EARLIER THIS YEAR...
Hard-Edge Painting
Class 6-417
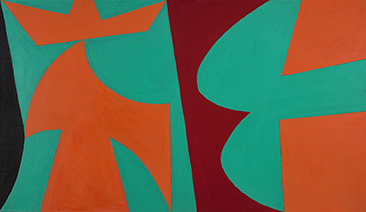
Sixth grade students in class 6-417 are learning about the Hard-Edge painting style that developed in the 1950s and flourished in the 1960s and 1970s. Students examined a variety of paintings in the Hard-Edge style. Students worked with the basic art elements of line and shape to create a simple yet interesting composition. Students selected a limited color scheme and are painting their composition in a Hard-Edge style. Look below for extra credit and enrichment ideas.
Home Link Option One: View Class Power Point:
Sit together as a family and look at this power point. Students should be able to explain the basic concepts of non-objective Hard-Edge painting that we discussed in class. Answer one of the questions from the presentation in a complete paragraph. Place your name and class on top of the sheet with the paragraph and submit it to Mrs. Wine in class. OR....you may type your answer and send it to Mrs. Wine at ewine@schools.nyc.gov. Make sure to include your name and class on emailed response.
Home Link Option Two: Take a Closer Look at Frank Stella:


Frank Stella is one of the artists we briefly examined in the Hard-Edge Power Point introduction. He is one of the most famous American contemporary painters. In 2015, there was a huge retrospective exhibition of his work at the Whitney Museum of American Art on the west side of Manhattan. Mrs. Wine visited the exhibit several times as seen in the photos above and below. Click this link to the exhibit on the Whitney's website: http://whitney.org/Exhibitions/FrankStella Explore the works and listen to some of the audio clips. Then write about what you have learned about this fantastic American artist!!

Home Link Option 3: Click this link to watch a short YouTube video on Hard Edge paintings. (It is less than 3 minutes long) Create your own Hard Edge artwork of your own at home. On the back of the artwork, write one thing you learned or noticed while watching the video and write one question you have.


Home Link Option 3: Click this link to watch a short YouTube video on Hard Edge paintings. (It is less than 3 minutes long) Create your own Hard Edge artwork of your own at home. On the back of the artwork, write one thing you learned or noticed while watching the video and write one question you have.
Watercolor Rural Landscape Painting
Class 6-419

Students in class 6-419 are learning about the American Folk Artist, Grandma Moses. Moses was a self-taught artist who did not gain recognition until after the age of 70. Students will be using different perspective techniques to show the element of space in a rural landscape. They will learn to use different watercolor techniques to create their paintings. Just as Grandma Moses worked from the natural landscape around her, students are being encouraged to work from rural landscapes they have visited, especially from their home countries. Look below for extra credit opportunities connected to this project.

Home Link Option 1: Review the Power Point on Grandma Moses that we looked at in class. Look closely at the paintings by Grandma Moses on slides 4 - 7. Choose one of the questions from slides 4 - 7 and answer that questions on loose leaf. Be sure to try to include art vocabulary in your response. Answer the question in a complete paragraph. Write your name and class at the top and submit during art class. You could also type your response on Google Docs and email your response to Mrs. Wine at ewine@schools.nyc.gov
Grandma Moses Power Point
Home Link Option 2: Find a photo either on the internet or from a photo you or your family has taken of a rural setting. Create a drawing inspired by this place. Remember, you do not need to copy the photo exactly. Work to use at least three perspective techniques: detail, overlap, size, and placement. The drawing does not need to be colored in; it could be a simple contour drawing. Write your name and class on the back of this drawings and bring it to art class with you. You may work from your drawing and/or bring the photo to work from in class.


Here is a photo that I am inspired by. It is from my home state of WV. I have seen this image in many photos, but did not visit it in person until recently.
Home Link Option 3: Watch this video clip that we watched in class today. Look at how the artist layered the colors in the painting working from background to foreground. Also, notice how darker colors were layered on top of lighter colors. Consider the techniques we practiced in class. Continue exploring other watercolor painting videos on YouTube if you wish.
You may write a detailed plan of how you will paint your landscape. What colors will you choose and why? What techniques will you use in which areas? What do you think you should paint first, second, and so on. Bring your plan with you to art class and use it as you work. Turn the written plan in with your painting for extra credit.
OR
Practice watercolor techniques on your own at home. You can buy a watercolor set at the dollar store if you do not have one. Copy paper is not ideal, but it will work for practice. You could also get watercolor paper at Artists and Craftsman located on 34th street (just down from Queens Blvd) or from Michaels (on Northern Blvd). You could just practice techniques or you could practice painting a landscape.
Drawing Realistic Hands
Class 6 - 417

Sixth grade students in Mrs. Wine's art classes are working to create drawings using variegated lines and shading to achieve a sense of realism. Students began by studying the works of Dutch artist M.C. Escher for inspiration. Students practiced using variegated lines, shading techniques, blind and semi-blind contour drawings before beginning their final pencil drawing. Select an option below to learn more about this project and to earn bonus points in art class.
Option 1 Power Point Review: Look at the Power Point we viewed in class together as a family. Students should be able to explain the slides we reviewed in class. To earn extra credit points, students need to answer the question on the next to last slide, "How did Escher create a sense of realism in his work?" Do not forget to include your name and class on your responses. Answers may be written on loose leaf and submitted to Mrs. Wine in class or emailed to her at ewine@schools.nyc.gov
Option 2 Blind Contour Practice: Watch the same video we watched in class with a family member or friend. Teach someone at home how to make blind and semi-blind drawings. Demonstrate each technique to them and then have them make a drawing of their own. Remember to draw slowly and to use the analogy of tracing an ant as it slowly crawls over the edges of the object. Please draw on unlined paper. (Copy paper is fine.) You may draw your hands, shoes, fruits or vegetables or anything you wish. Discuss what was easy and challenging about each technique. Both student and family member should place their names and class on the back of the work. Drawings should be submitted to Mrs. Wine in class to earn bonus points in art.


Option 3 Try Drawing a Show with Both Contours and Shading: Create a realistic drawing of a shoe. Warm up by making some blind and semi-blind drawings of the shoe. Then create a detailed contour drawing using variegated line. Look carefully and include all details of the shoe. Finally add value and shading to create a sense of realism in your drawing.
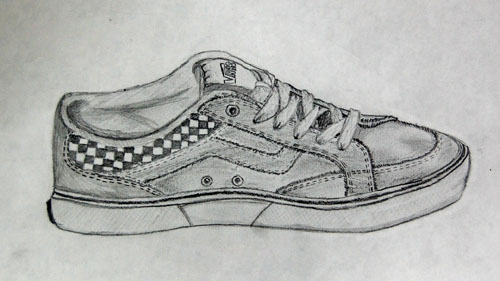
If you want an extra challenge, use a little colored pencil to add value and color too!! Make sure that final drawings are on unlined paper. (Copy paper is fine.) Place your name and class on the back of the drawing. Submit your drawing in class to Mrs. Wine to earn extra credit points in art class.
Option 1 Power Point Review: Look at the Power Point we viewed in class together as a family. Students should be able to explain the slides we reviewed in class. To earn extra credit points, students need to answer the question on the next to last slide, "How did Escher create a sense of realism in his work?" Do not forget to include your name and class on your responses. Answers may be written on loose leaf and submitted to Mrs. Wine in class or emailed to her at ewine@schools.nyc.gov
Option 2 Blind Contour Practice: Watch the same video we watched in class with a family member or friend. Teach someone at home how to make blind and semi-blind drawings. Demonstrate each technique to them and then have them make a drawing of their own. Remember to draw slowly and to use the analogy of tracing an ant as it slowly crawls over the edges of the object. Please draw on unlined paper. (Copy paper is fine.) You may draw your hands, shoes, fruits or vegetables or anything you wish. Discuss what was easy and challenging about each technique. Both student and family member should place their names and class on the back of the work. Drawings should be submitted to Mrs. Wine in class to earn bonus points in art.
Option 3 Try Drawing a Show with Both Contours and Shading: Create a realistic drawing of a shoe. Warm up by making some blind and semi-blind drawings of the shoe. Then create a detailed contour drawing using variegated line. Look carefully and include all details of the shoe. Finally add value and shading to create a sense of realism in your drawing.

If you want an extra challenge, use a little colored pencil to add value and color too!! Make sure that final drawings are on unlined paper. (Copy paper is fine.) Place your name and class on the back of the drawing. Submit your drawing in class to Mrs. Wine to earn extra credit points in art class.

Art Expo 6th Grade


PREVIOUS YEARS....
Klimt Meets Zentangle
Class 6 - 413

Students in class 6-413 looked at the Austrian artist Gustav Klimt and examined his portraits. They learned how Klimt's portraits were influenced by fashion design of his time. Students observed how Klimt used patterns with layered shapes, especially in the clothing of his models. Then students looked at contemporary Zentangle artworks using portraits as a theme and compared these to Klimt's works. Students learned how Zentangle developed and examined how different lines and shapes can be used to create Zentangle designs. In this project students will take a self-portrait or portrait and combine ideas from Klimt and Zentangle to create an original artwork.
HW: Take a photo of yourself and email it to Mrs. Wine to print and use in this artwork. The photo should be a close-up (shoulders and head area). If you do not want to use a photo of yourself, you may bring a magazine photo or email Mrs. Wine a link for a portrait you found online. Remember, you can add items such as hats or headphones to make the portrait more interesting and more personal. Email photos to: ewine@schools.nyc.gov
Extra Credit Opportunities:
Home Link Option 1: Look at the Power Point we viewed in class. Describe one of the artworks from the Power Point in detail. Focus on what elements of art were used (line, shape, color, etc.) and how the artist arranged them. Give extra focus to how the artist used pattern in the portrait. Give the slide number so that it is easy to tell which artwork you are describing.
Continuous Line Self-Portraits
Class 6 - 419

Students in the sixth grade are continuing to work on creating art from observation. Students looked at basic portrait proportions and practiced drawing continuous line self-portraits using mirrors in class. Students will make a final continuous line self-portrait. Then students will experiment with different watercolor techniques including creating washes and glazes and working with different color schemes. Students will add color to their self-portrait using the color scheme and technique of their choice.
Look below for different home link options. You may do these options together as a family or students may do them on their own. Submit work to Mrs. Wine for extra credit before the end of the unit.
Use this Power Point to follow along with what we are doing in class each day. The sketchbook homework for each week is listed at the bottom of the Power Point slide for the day.
Continuous Line Self Portrait Do Nows and HW
This is the YouTube link to watch the demonstration of continuous line portraits that we viewed in class. Use it to help you as you practice at home!!
Home Link Option 1: View Power Point from class.
Sit together as a family and look at this power point. Students should be able to explain the basic concepts of continuous line portraits that we have discussed in class. Answer one of the questions from the presentation in a complete paragraph. Place your name and class on top of the sheet with the paragraph and submit it to Mrs. Wine in class. OR....you may type your answer and send it to Mrs. Wine at ewine@schools.nyc.gov. Make sure to include your name and class on emailed response.

Home Link Option 2: Use the portrait proportion techniques that we learned in class to create a realistic pencil drawing of yourself. Use the pages from your sketchbook to practice drawing your eyes, nose, mouth, and other facial features before you include these in your drawing. Add shading, as we learned in our drawing unity, to create a sense of realism in your drawing. Place your name and class on the back of your work and turn it in to Mrs. Wine for extra credit.
Home Link Option 3: Read about the Hard-Edge painting project that the other 6th grade class is doing below. Click the link and view the Power Point about Hard-Edge painting. Create your own drawing or painting in the Hard-Edge style. Place your name and class on the back of your work and submit it to Mrs. Wine for extra credit.
Hand Drawings: Op Art vs. Zentangle


Students in class 6 - 419 were introduced to two different types of art that could use the human hand as a subject matter. Students learned about the history and development of both Optical Art and Zentangle Art. Students looked at different examples of Op Art and Zentangle patterns. Students chose which type of drawing project they wanted to complete. Look at the Power Point below to review what we learned about both types of art in class.
Figure Sculptures: Alberto Giacometti
Class 6-417

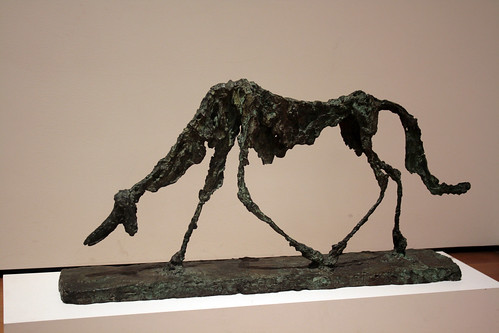
Sixth grade students are currently studying the art of Swiss sculptor Alberto Giacometti. Giacometti is known for his abstract sculptures of elongated figures. Students will use one of their gesture drawings as their inspiration for an aluminum sculpture. The goal of the project is to show action and movement in a metal sculpture in the style of Giacometti.
Exrta credit opportunities to extend students' knowledge are listed below!!
Extra Credit work may be submitted on paper in class or via email to ewine@schools.nyc.gov All work must include your name and class.
Option 1: Answer questions from class Power Point
Click this link to access the Power Point we viewed in class. Observe the work of New Jersey artist Linnea Rhodes. Answer two questions from the slides. Be sure to restate the question and include the slide number. Use art vocabulary in your response.
Option 2: Click the following link to read this article on one Giacometti sculpture that sold at auction in 2010 for 65 million Euros!!! THAT IS OVER $88 MILLION IN U.S. DOLLARS!!!!


Read this article from BBC News that describes how an art dealer can determine what is and is not a fair price for artwork sold at auction. Write a paragraph that explains
whether or not you think Giacometti's sculpture is worth this much money. Provide evidence from the article to support your opinion.
Option 3: Create an Animal Sculpture
Look at this sculpture of a dog created by Giacometti. At home, use aluminum to create a sculpture of an animal of your choice. (Ask your parents before you use the aluminum!!) You may want to make a few gesture drawings of your animal first. Compare and contrast this process to how we made the figures in class. Were there any new challenges that you had to overcome? Write your response in a paragraph. Submit the paragraph and the sculpture (or a photo of your sculpture) to earn your extra credit points.

Option 2: Click the following link to read this article on one Giacometti sculpture that sold at auction in 2010 for 65 million Euros!!! THAT IS OVER $88 MILLION IN U.S. DOLLARS!!!!
Read this article from BBC News that describes how an art dealer can determine what is and is not a fair price for artwork sold at auction. Write a paragraph that explains
whether or not you think Giacometti's sculpture is worth this much money. Provide evidence from the article to support your opinion.
Option 3: Create an Animal Sculpture
Gesture Drawing: Drawing from Life
Class 6 - 417

Gesture Drawings: Students began their sculpture unit by learning about different techniques of gesture drawings. Gesture drawings are quick sketches used to capture the movement and action of a figure. Students practiced getting the proportions of the human body correct in drawings of their teacher and peers.
Extra credit is available for completing additional gesture drawings at home. Click the following link to view the Power Point on gesture drawing that we discussed in class.
Previous Years' Projects
Digital Checkerboard

Students in class 6-413 are engaged in a special digital art project. Students are working with Mrs. Wine in the computer lab one day a week and using the Paint application to create a digital checkerboard inspired artwork. Students are using both geometric and organic shapes and are also using the idea of positive and negative space to create their unique checkerboard artworks.
Students who wish to practice or work at home may follow the directions on the Power Point below.
Work completed at home may be submitted three ways:
1. Print a copy of the completed artwork in color and bring to class.
2. Save the file to a flash drive. Save with the name 416yourname. (Put your name, not the word "yourname." Bring the flash drive to class so Mrs. Wine can download your work.
3. Save the file to your computer with the name 416yourname and email the file to Mrs. Wine at ewine@schools.nyc.gov
There should be plenty of class time for students to complete work. The above information is for students who choose to do additional work on their own at home.
Relief Printmaking

Students are working on a relief print project using insects as a theme. Students are sketching different insects from photos and selecting one sketch to use as the basis for a relief print. Students will use ball point pens to carve their insects on foam plates focusing on using different textures. Students will create three prints from their foam plate using black ink and a paper color of their choice.
Exrta credit opportunities to extend students' knowledge are listed below!!
Extra Credit work may be submitted on paper in class or via email to ewine@schools.nyc.gov All work must include your name and class.
Relief Printmaking Power Point
Option 3: Draw insects: Find some photos of insects on the computer. Create at least one detailed sketch. Submit sketch in class for credit. If the sketch is approved, you may use it as the final drawing for your foam engraving.
Quilling Collage
Students with missing homework: Click the following link to view a short Power Point about your homework. The final slide contains the original homework sheet you received. You only need to answer the questions if you completed you symbol sketch in class.

Sample Created by Ms. Benjamin
Quilling: Sixth Grade students are working with Ms. Andrea Benjamin, a student teacher from City College. Under the instruction of Ms. Benjamin, students are learning a three-dimensional collage technique known as quilling. Quilling, also known as paper filigree is a form of art that involves using strips of paper that are rolled, shaped, and glued together to create decorative designs. Quilling dates back to the Renaissance age and is still used today. Students will practice quilling techniques in class then use selected techniques to quill a design for an abstract symbol.
Extra Credit work may be submitted on paper in class or via email to ewine@schools.nyc.gov All work must include your name and class.
Option 1: Answer questions from class Power Point
Click this link to access the Power Point we viewed in class. Observe the work of quilling artist Yulia Brodskaya. Answer one question from the slides. Be sure to restate the question and include the slide number. Select one of the student examples from the end of the presentation, describe the quilling collage and explain why you liked it. You completed extra credit assignment should be two paragraphs in length. Use art vocabulary in your responses.
Quilling Power Point
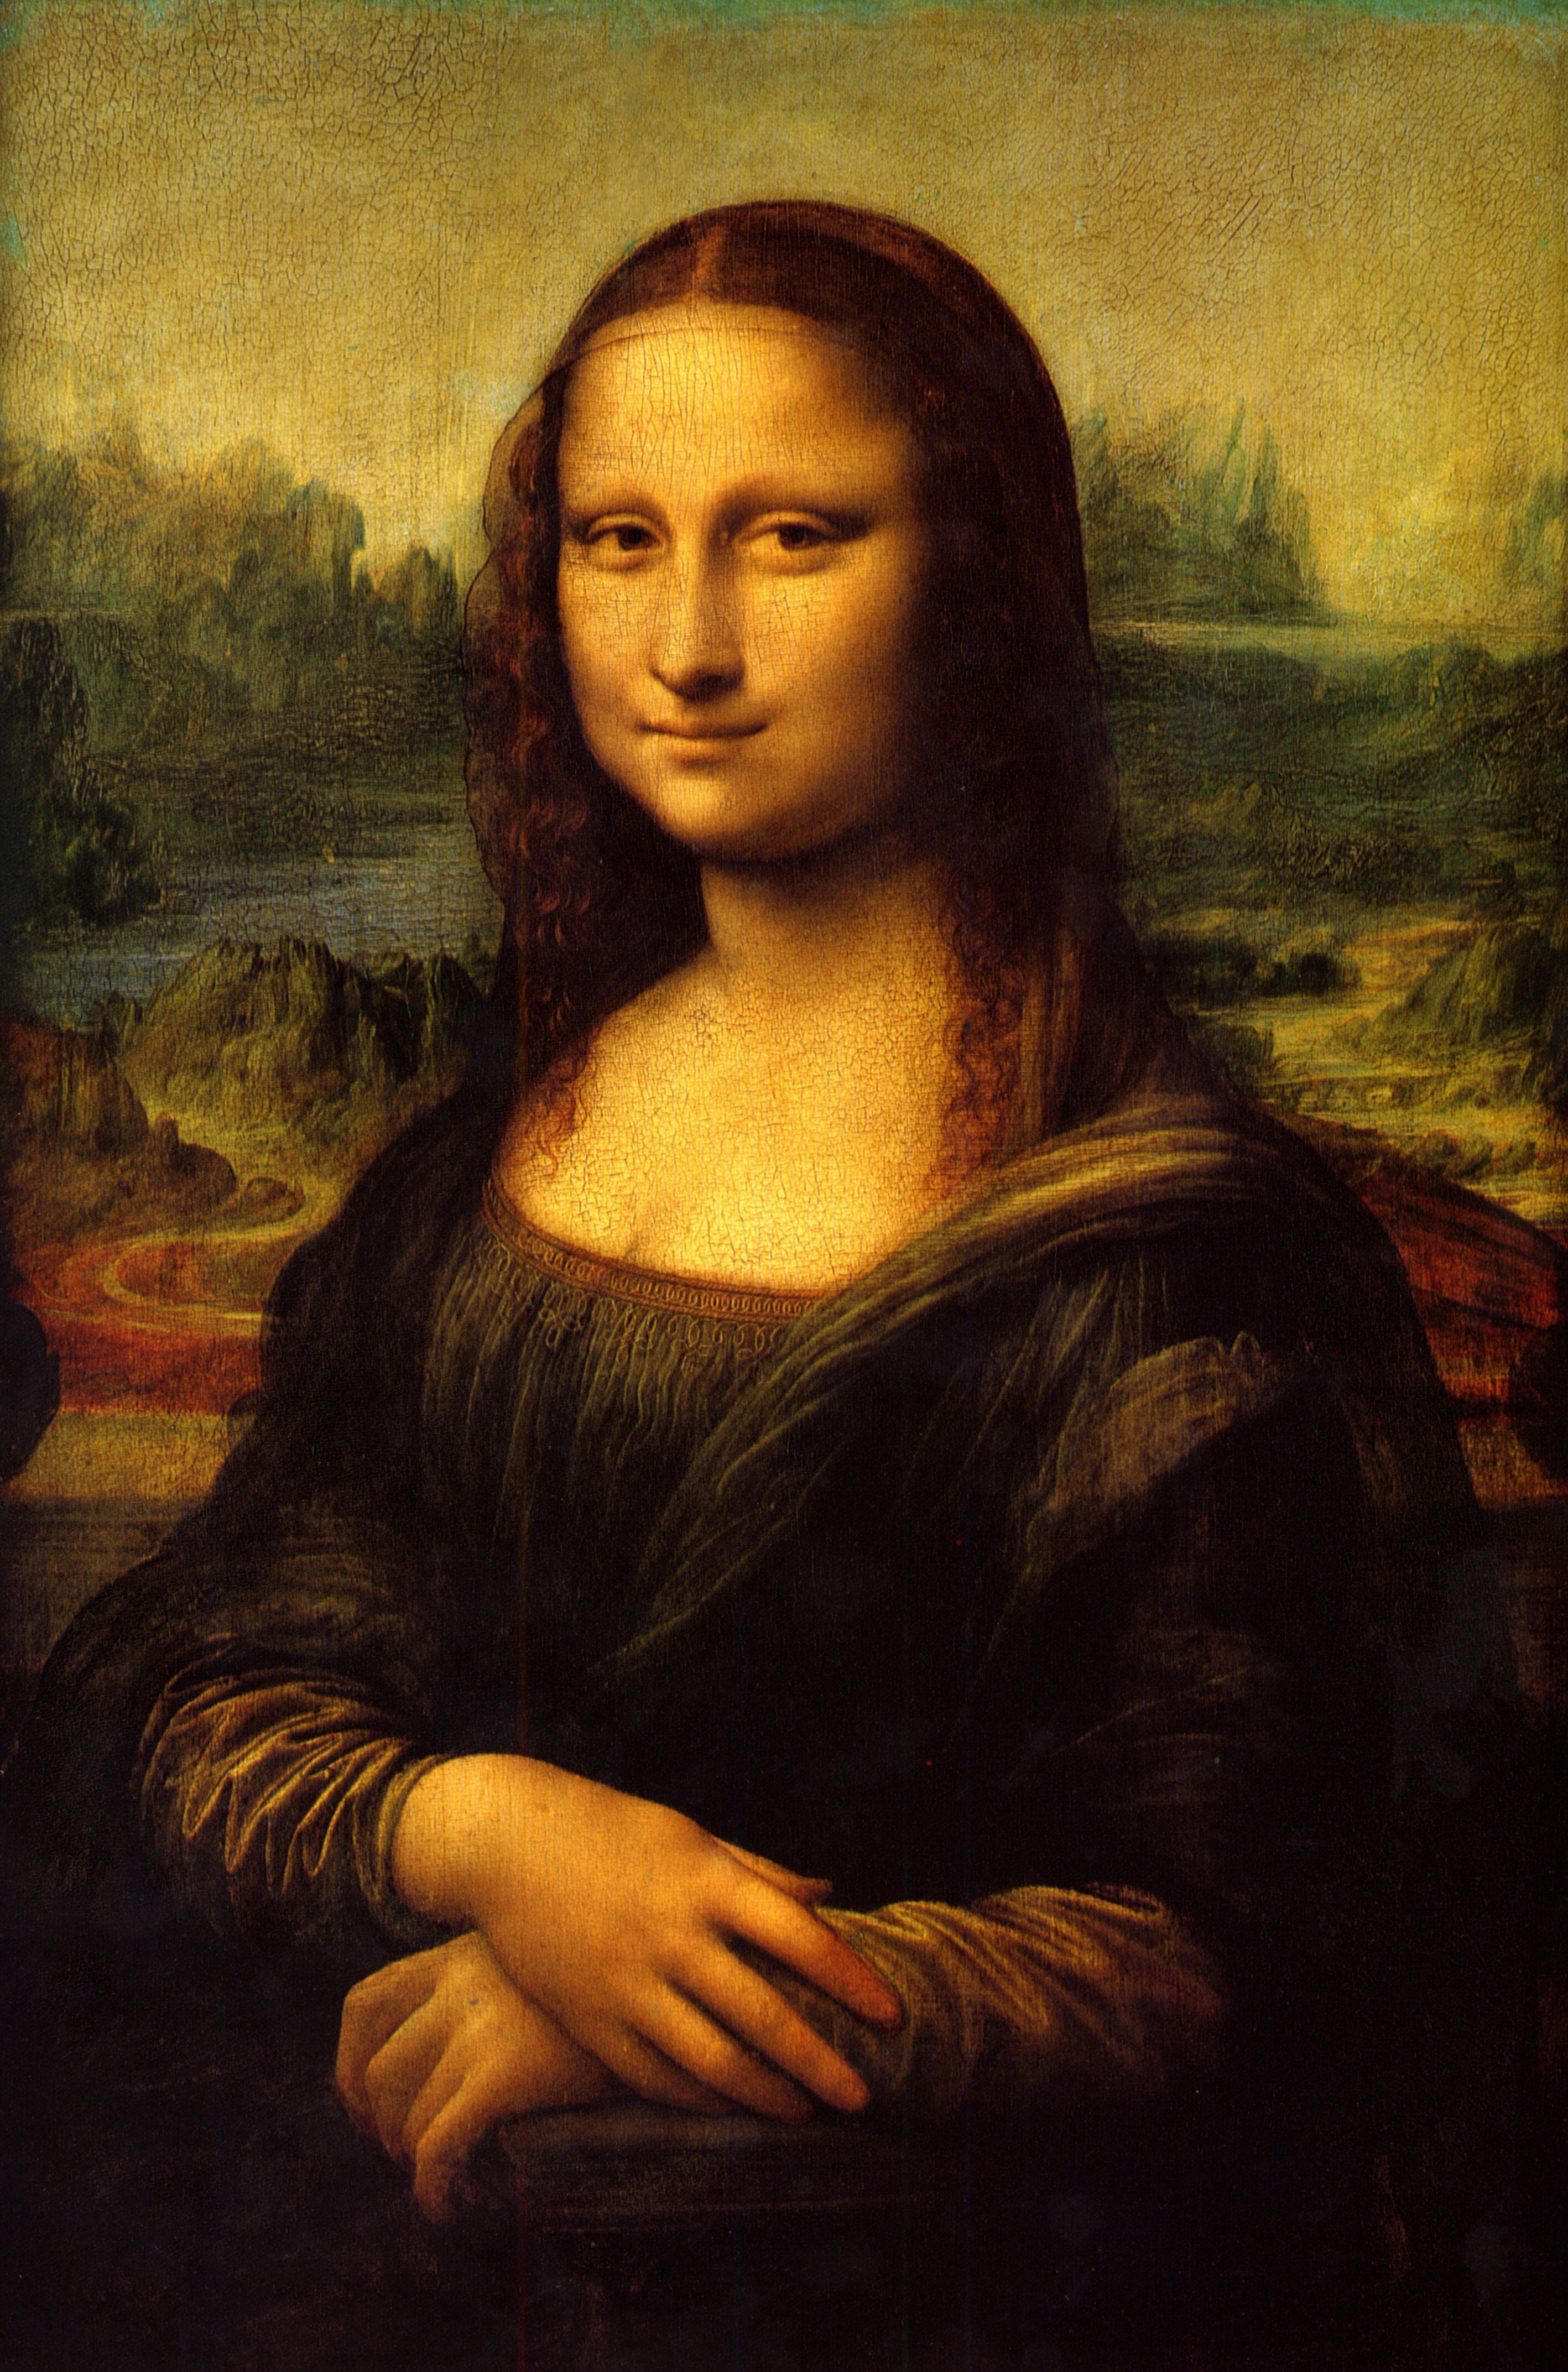
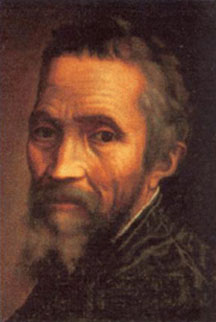
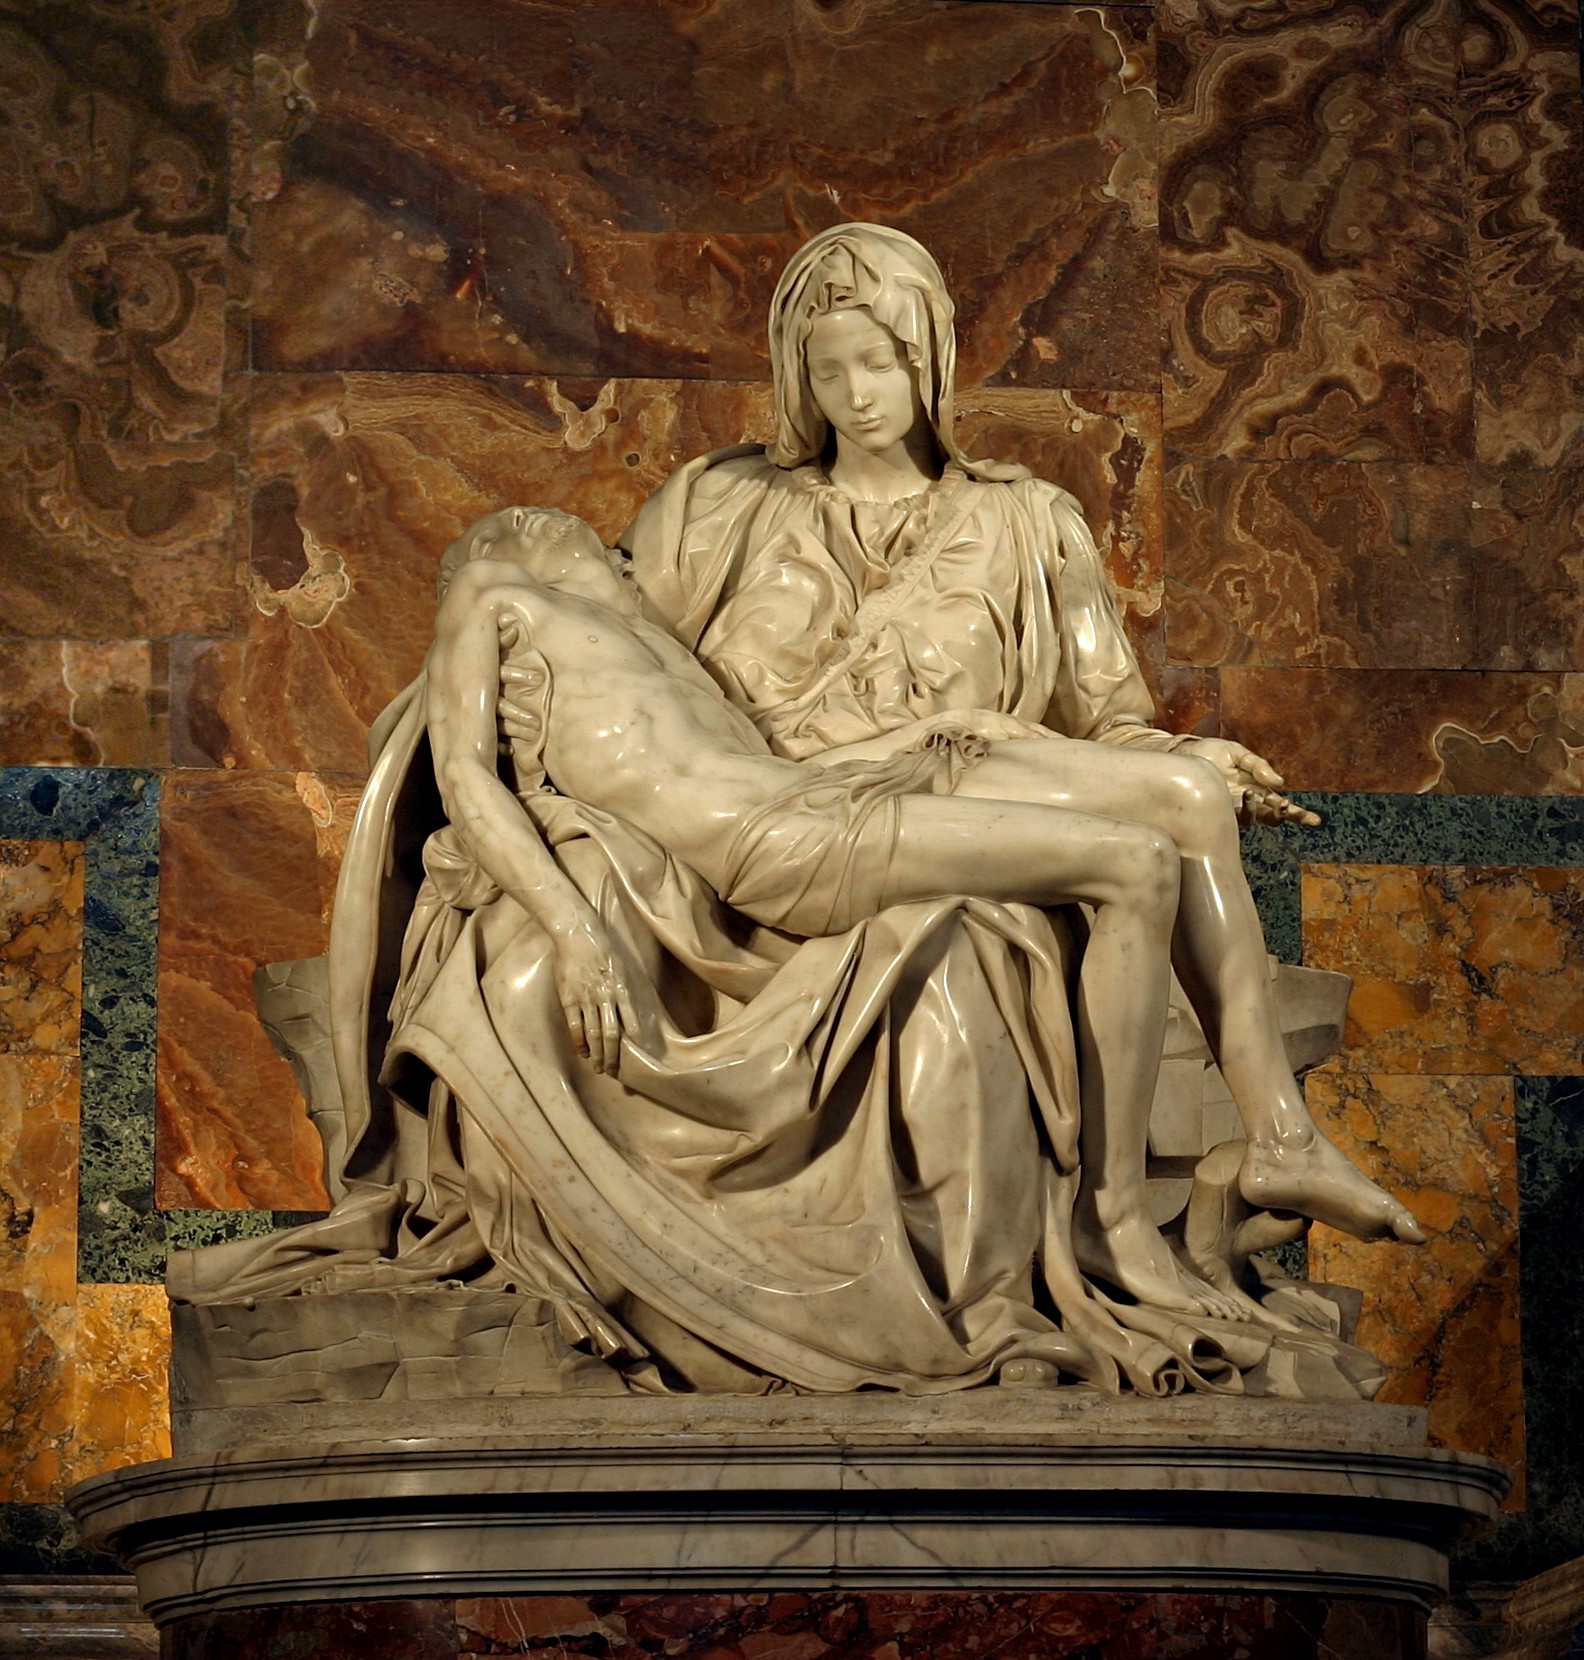
Option 2: Compare and Contrast the two most famous Renaissance artists, Leonardo da Vinci and Michelangelo
Quilling was originally developed during the Renaissance. The two most famous artists of this period were Italians Leonardo da Vinci and Michelangelo (no, not the Ninja Turtles...the REAL artists!!). Visit these two web pages from Bio.True Story to learn more about these amazing artists. On these websites, you can read about the artists as well as watch short 2 - 3 minute videos about their lives and works.
Leonardo da Vinci vs. Michelangelo

Option 1: Answer questions from class Power Point
Click this link to access the Power Point we viewed in class. Observe the work of quilling artist Yulia Brodskaya. Answer one question from the slides. Be sure to restate the question and include the slide number. Select one of the student examples from the end of the presentation, describe the quilling collage and explain why you liked it. You completed extra credit assignment should be two paragraphs in length. Use art vocabulary in your responses.
Quilling Power Point
Option 2: Compare and Contrast the two most famous Renaissance artists, Leonardo da Vinci and Michelangelo
Quilling was originally developed during the Renaissance. The two most famous artists of this period were Italians Leonardo da Vinci and Michelangelo (no, not the Ninja Turtles...the REAL artists!!). Visit these two web pages from Bio.True Story to learn more about these amazing artists. On these websites, you can read about the artists as well as watch short 2 - 3 minute videos about their lives and works.
Leonardo da Vinci vs. Michelangelo
Self Portrait by da Vinci
Mona Lisa by da Vinci
Self Portrait by Michelangelo
Pieta by Michelangelo
Write at least one paragraph comparing and contrasting these two master artists. Cite evidence from the text and/or videos to show what you have learned. Include your personal opinion; which artist's works do you like better and why. Email paragraph to Mrs. Wine or give it to her in class.
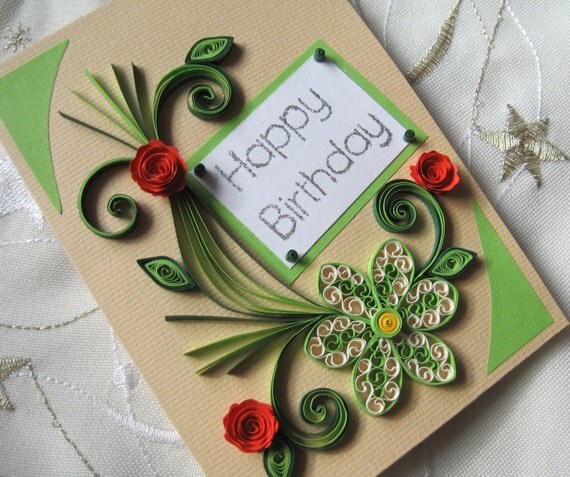
Option 3: Quilling Greeting Card
Ms. Benjamin mentioned that today quilling is often used in hand-made greeting cards. Cut some construction paper into strips and quill your own design on a greeting card. Use any of the quilling techniques that you have learned. Look for design ideas by searching Google Images. Submit your completed card to Mrs. Wine.
Mid-Winter Break Assignment
Digital Cityscape

Digital Cityscape: Students will explore the digital technology medium for art making in this project using Microsoft Paint. Students will create a digital cityscape that uses overlapping buildings with proportional details such as doors and windows. Cityscapes may be realistic or abstract. Students who have access to Microsoft Paint are expected to complete the project over the mid-winter break. Students may submit work by printing it from a color printer, saving it to a flash drive, or emailing the work directly to ewine@schools.nyc.gov
Students who do not have access to Microsoft Paint will be given one class day to complete the assignment on a computer in the art room.
View the Power Point Presentation that students discussed in class by clicking the link below.
Extra Credit Option: Answer two of the questions from the Power Point in two complete paragraphs. Submit responses in writing in class or by email to ewine@schools.nyc.gov
View the Detailed Project Rubric by clicking the link below. This rubric will be used to evaluate all digital cityscapes and a project grade will be assigned.
Watercolor Over Pen & Ink: Linnea Rhodes

Sixth Grade classes have finished pen and ink drawings of neighborhood buildings across the street from the school. Next they will study a local artist from New Jersey, Linnea Rhodes and work in a process similar to hers.
Students are learning how to create "original colors" by mixing transparent watercolors. Students will layer transparent watercolors over their pen and ink drawings. Exrta credit opportunities to extend students' knowledge are listed below!!
Extra Credit work may be submitted on paper in class or via email to ewine@schools.nyc.gov All work must include your name and class.
Option 1: Answer questions from class Power Point
Click this link to access the Power Point we viewed in class. Observe the work of New Jersey artist Linnea Rhodes. Answer two questions from the slides. Be sure to restate the question and include the slide number. Use art vocabulary in your response.
Linnea Rhodes: Watercolor Over Pen and Ink
Option 2: Compare and Contrast
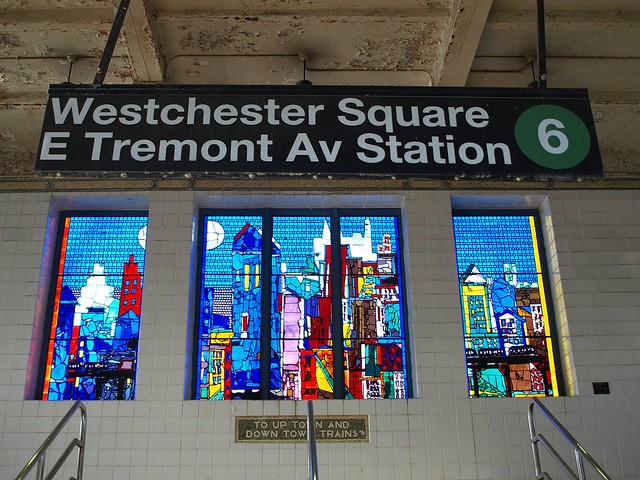
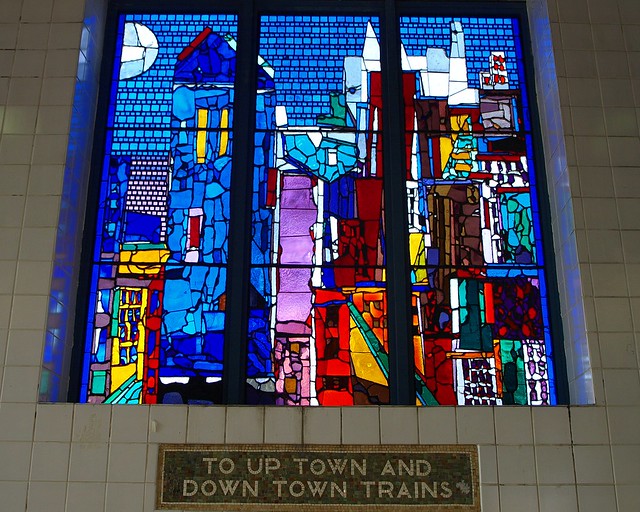
We often refer to successful watercolor paintings as having a transparent quality. You can see through the colors much like you can see through a stained glass window, which is also transparent. Observe these photos of Romare Bearden's City of Light from the Westchester Square subway station. (Or even better yet, go to Westchester Square and view this artwork in person!!) Bearden completed this stained glass design shortly before his death in 1988. The design is based on one of Bearden's collages that shows a train weaving in and out of a cityscape .
Compare and contrast the appearance of the main stained glass panel seen below to one of Rhodes's finished watercolor paintings. Write your answer in a complete paragraph using art vocabulary.
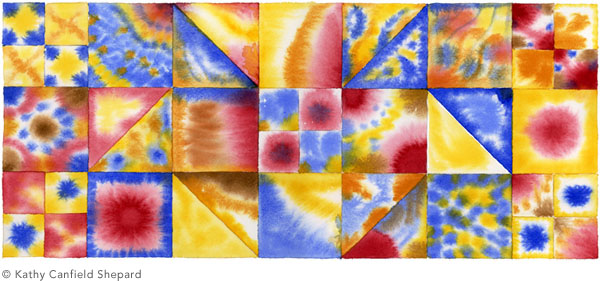
Option 3: Create Your Own Color Grid
In class we painted a color grid using glazes of transparent watercolors. Below are some examples of different color grids. Create a color grid at home using at least five colors. You may use crayon or colored pencil. Color lightly so that you can see what new original colors you create in the overlap spaces. Describe how these colors and this process is similar to the glazed watercolor grid we created in class.


Students are learning how to create "original colors" by mixing transparent watercolors. Students will layer transparent watercolors over their pen and ink drawings. Exrta credit opportunities to extend students' knowledge are listed below!!
Extra Credit work may be submitted on paper in class or via email to ewine@schools.nyc.gov All work must include your name and class.
Option 1: Answer questions from class Power Point
Click this link to access the Power Point we viewed in class. Observe the work of New Jersey artist Linnea Rhodes. Answer two questions from the slides. Be sure to restate the question and include the slide number. Use art vocabulary in your response.
Linnea Rhodes: Watercolor Over Pen and Ink
Option 2: Compare and Contrast
We often refer to successful watercolor paintings as having a transparent quality. You can see through the colors much like you can see through a stained glass window, which is also transparent. Observe these photos of Romare Bearden's City of Light from the Westchester Square subway station. (Or even better yet, go to Westchester Square and view this artwork in person!!) Bearden completed this stained glass design shortly before his death in 1988. The design is based on one of Bearden's collages that shows a train weaving in and out of a cityscape .
Compare and contrast the appearance of the main stained glass panel seen below to one of Rhodes's finished watercolor paintings. Write your answer in a complete paragraph using art vocabulary.
Option 3: Create Your Own Color Grid
In class we painted a color grid using glazes of transparent watercolors. Below are some examples of different color grids. Create a color grid at home using at least five colors. You may use crayon or colored pencil. Color lightly so that you can see what new original colors you create in the overlap spaces. Describe how these colors and this process is similar to the glazed watercolor grid we created in class.

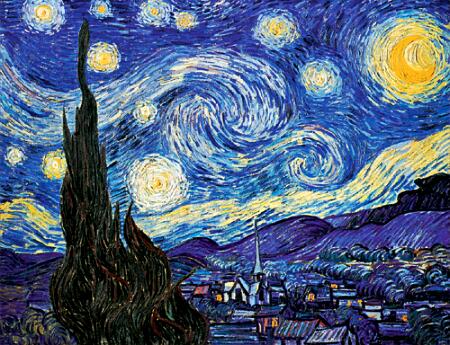
Pen and Ink Drawing: Vincent Van Gogh

Extra Credit work may be submitted on paper in class or via email to ewine@schools.nyc.gov All work must include your name and class.
Option 1:
Click this link to access the Power Point on Van Gogh's pen and ink drawings that we viewed in class.
https://docs.google.com/file/d/0B0DLR1KLQCuLc1o2ODVlT3VLTWs/edit?usp=sharing
Answer two of these questions. Write both the question and your response.
Option 2:
Compare and contrast Van Gogh' drawing of Starry Night to his painting of the same title seen below. Your response should be one paragraph in length.
Option 3:
Look at the following images to see how modern cartoon and animation artists use pen and ink techniques in their drawings. Draw your own cartoon or animation style drawing using two or three techniques that we have learned in class. Submit your drawing in class.


This comment has been removed by a blog administrator.
ReplyDeleteThis comment has been removed by the author.
Delete