Musical Instrument Still Life Drawing

Students in classes 5-401 and 5-429 are beginning units of study that are focused on musical instruments. In the first unit, students will analyze musical instruments by creating realistic pencil or charcoal drawings. Students will hone observational techniques, work on proportion, and learn about shading in this drawing unit. Look below for enrichment and extra credit activities.

Option 1: View the Power Point we discussed in class. As a family, discuss what you see in these still life drawings. Use the questions on the slides to guide you. Write a paragraph to discuss something you have learned about still life art works. Place your name and class on your paper and submit it to Mrs. Wine in class. You could also submit your work by typing your response on Google Docs or in a Word document and email it to Mrs. Wine at ewine@schools.nyc.gov
Option 2: Watch the video on basic drawing and shading techniques that we viewed in class. Practice these techniques on a blank sheet of paper at home. (Copy paper is fine.)
Work on creating a wide range of values with smooth shading. Write your name and class on the back of the paper and turn it in to Mrs. Wine.
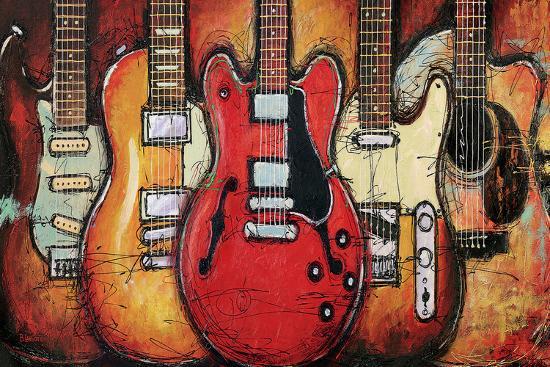
Option 3: Bruce Langton is one contemporary artist who has created several drawings of guitars. Look at how Langton cropped his guitars and uses a few colors to create interest. Create a drawing of a guitar or other instrument in his style and use crayon or oil pastel to add color. Try to limit yourself to just 4-5 colors and consider how your color choices will impact the mood of the drawing. Place your name and class on the back of the drawing and submit to Mrs. Wine.


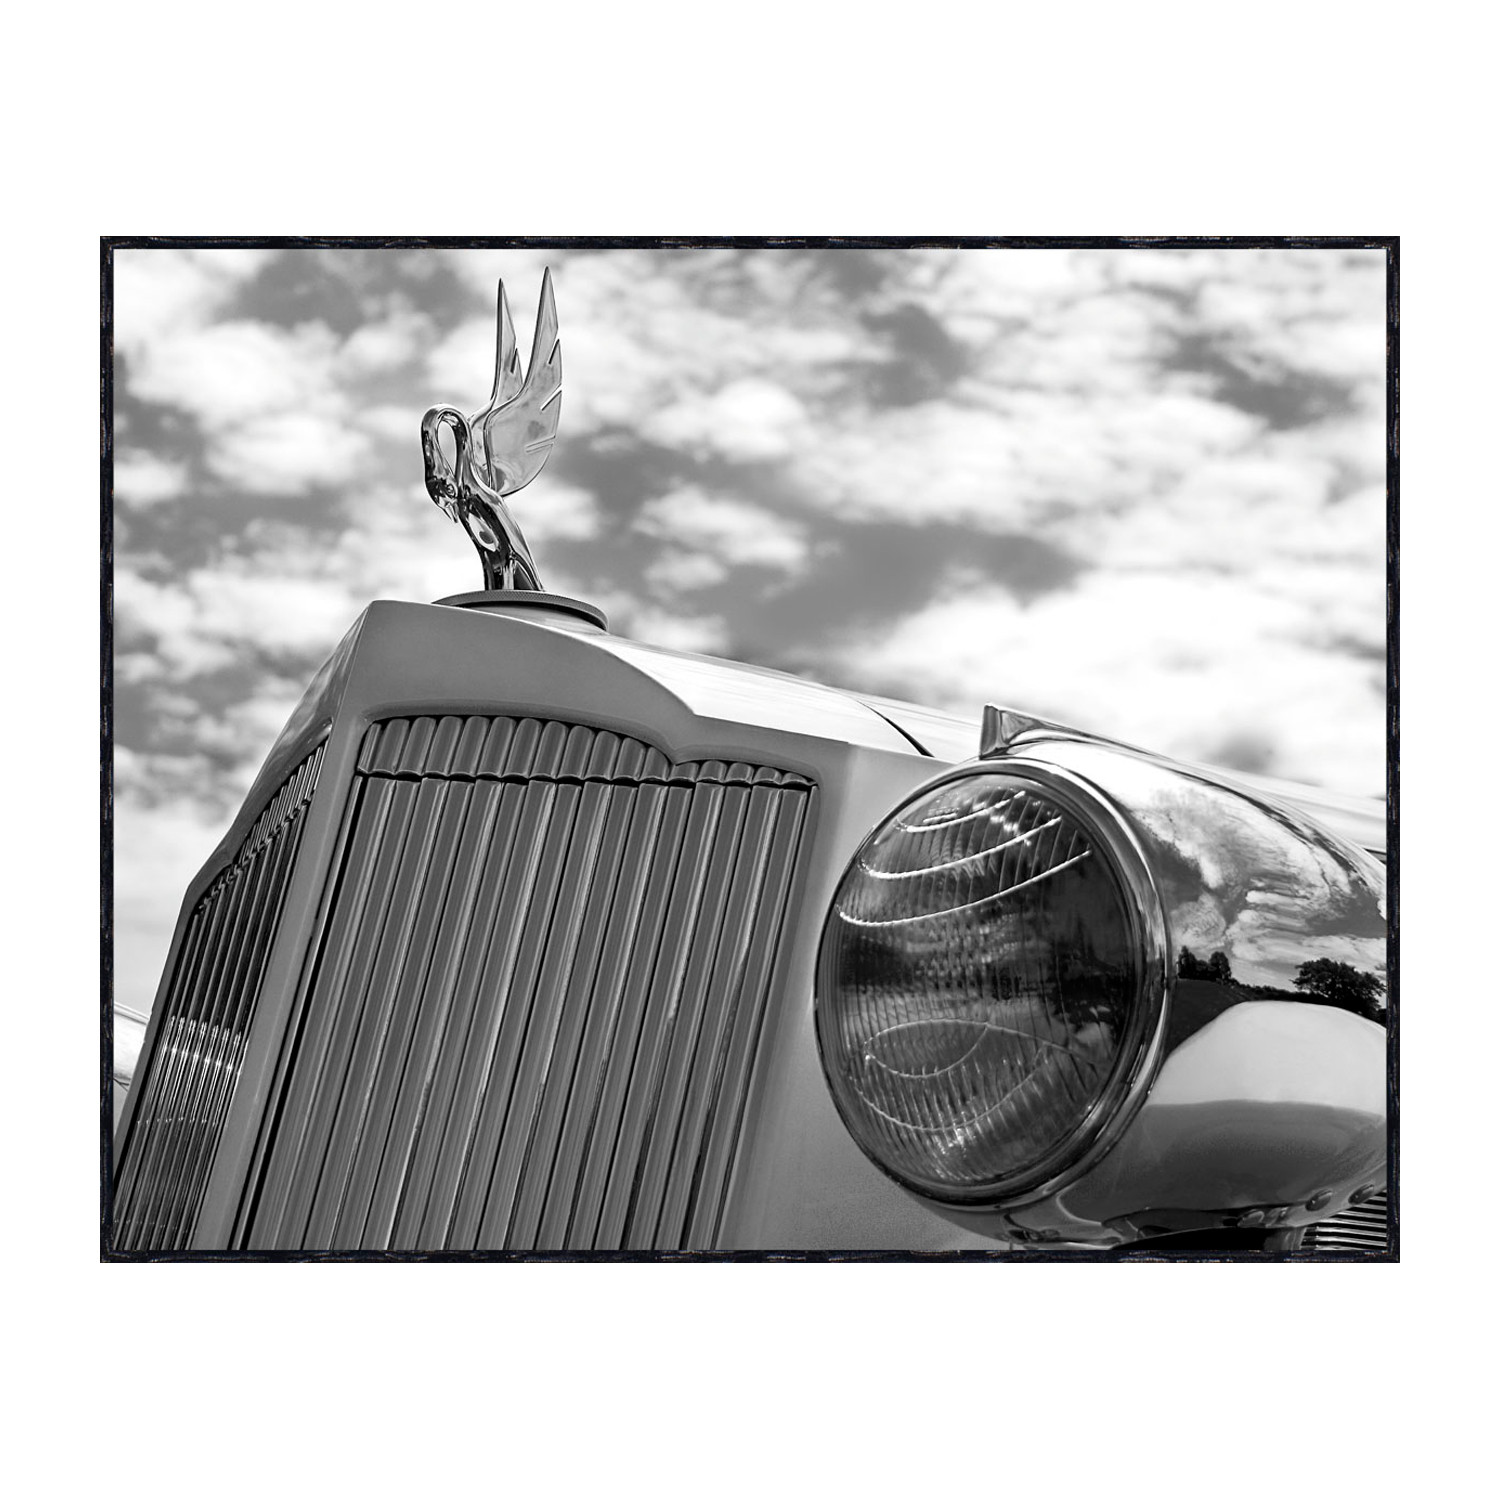
Option 4: Photography!! Some contemporary artists just as Richard James use photography to create still life art. Look at how James crops guitars and classic cars to create interesting photographic still life close ups. Use a camera to take some interesting close ups of still life objects. Be creative!! Any non-moving object will work. Consider trying a photo in black and white. Submit your best photo by emailing to Mrs. Wine at ewine@schools.nyc.gov or by printing it and submitting it in class.


Optical Illusions
Classes 5-402, 5-403, 5-405, and 5/6-217

Students in these 5th grade classes will be learning about the Op Art style. Students will learn about artists who influenced and worked in this style. They will discuss how many Op Art techniques rely on contrasting colors and geometric ideas. Students will choose one of the Op Art techniques illustrated above and create their own work in this style. Look for extension opportunities below to earn extra credit for this unit
Option 1: View the Power Point we discussed in class. As a family, discuss what you see in these Op Art drawings. Use the questions on the slides to guide you. Write a paragraph to discuss something you have learned about Op Art. Place your name and class on your paper and submit it to Mrs. Wine in class. You could also submit your work by typing your response on Google Docs or in a Word document and email it to Mrs. Wine at ewine@schools.nyc.gov
Op Art Power Point
Option 2: Watch the video on basic drawing and shading techniques that we viewed in class. Practice these techniques on a blank sheet of paper at home. (Copy paper is fine.)
Work on creating a wide range of values with smooth shading. Write your name and class on the back of the paper and turn it in to Mrs. Wine.
3. Look at the Optical Illusions on the webpage Optics for Kids. Which two illusions did you find most interesting and why? Write your answers on a sheet of loose leaf and give it to Mrs. Wine in class. Or type it in a Google Doc and send it to ewine@schools.nyc.gov
PREVIOUS YEARS:
Hello Families!! This page will have the same activities I posted on my Google classroom page in addition to descriptions of activities we would have actually done in art class. I will post a new activity each week, but there will be extra "enrichment" ideas below as well. Please make sure you find the project for YOUR CLASS!! (There are 2 different 5th grade projects here!) If you have any questions, please reach out to me via my school email at ewine@schools.nyc.gov
Classes 5-405 and 5-407 Scroll Down
Amate Paintings
Class 5 - 401 and 5-409

Week of March 30: Sketch birds in a realistic style to study their different parts. Focus on proper proportion. (How the size of one body part relates to another)

1. Work from one of these photos of Mexican birds or find a photo of your own. Sketch one bird large enough to fill your page or 3 - 4 smaller ones.
2. Take a photo of your best sketch and email to Mrs. Wine at ewine@schools.nyc.gov
Week of March 23: Review what we learned in class about Mexican folk art Amate paintings.
1. Read the Amate painting handout and look at the pictures and information on the Power Point.
Write a paragraph to explain what you know about Amate painting. You may type your paragraph on Google Docs and share with Mrs. Wine. Or you may write your paragraph on loose leaf. Take a photo of your paragraph on loose leaf (with a smartphone) and email to Mrs. Wine at ewine@schools.nyc.gov
In Class Activities and Enrichment:
Students in classes 5 - 409 and 5 - 401 are studying the Mexican folk art of Amate paintings. This is a traditional folk art painted on pieces of bark paper. Students will be sketching birds from observation. Then they will paint their birds on brown craft paper that has been washed with ink to imitate the appearance of amate paper. Students will use bright neon colors to paint their decorative birds. Look below for extra credit and enrichment opportunities.

Option 1: Look at the Power Point we will view in class on Amate Painting. Read along with your handout to learn about the history of the Mexican cultural art.
Select your favorite Amate painting from the Power Point slides. Describe this painting in detail using art vocabulary. Explain why it is your favorite. You may type your paragraph on Google Docs and share with Mrs. Wine. Or you may write your paragraph on loose leaf. Take a photo of your paragraph on loose leaf (with a smartphone) and email to Mrs. Wine at ewine@schools.nyc.gov
Option 2: Practice drawing birds from observation. You may choose to work in a realistic style or you may make the birds abstract like the Amate paintings by emphasizing the lines and shapes of the wings and/or tails. You may do a contour (line) drawing or you may add color if you wish. Click the links below for images to choose from or find your own.

For an extra challenge you can try drawing from a photo of a real bird. Click below to see some images or find one of your own.

Place your name and class on the back of your drawing and turn it in to Mrs. Wine in class. Or you may take a photo of your drawing (with a smartphone) and email it to Mrs. Wine at ewine@schools.nyc.gov
Option 3: Watch these three short YouTube videos about Amate paper.
Respond to these videos in any way you choose. You could write a poem or a paragraph. You could craw a picture of the Mexican landscape in this area or draw a picture of part of the process of creating the paper. You could write and illustrate an idea with something you could create from Amate paper. Submit your response to Mrs. Wine in class. If it is written you could also submit online. You could also take a photo (with a smartphone) and email it to Mrs. Wine at ewine@schools.nyc.gov
Paul Klee Inspired Cityscape
Classes 5 - 405 and 5 - 407
Classes 5 - 405 and 5 - 407

Week of April 6: This week you will create a sketch of a cityscape using a realistic style. Artists often study a subject by drawing realistically. Paul Klee even began his art career by working in a realistic style. What kinds of shapes do you see? What details do you notice.
1. Look at the steps listed and examples shown in this Power Point.
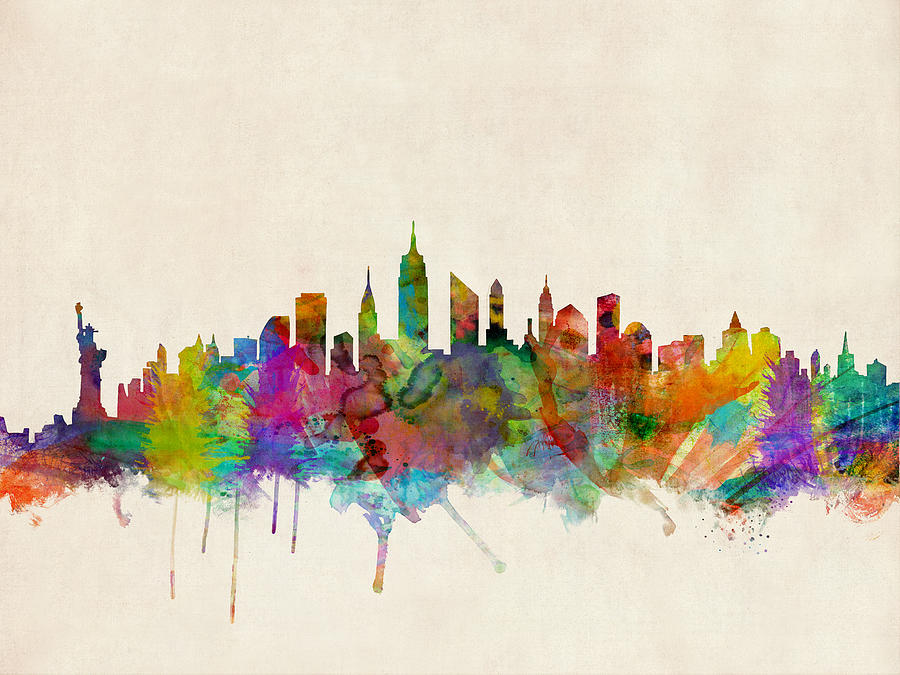
2. Sketch NYC in a realistic style. If you don't want to draw NYC, that's OK. Think about your favorite city or a city you would like to visit. Try to find a photo to inspire you. Work to fill your page.
3. Take a photo of your cityscape and email it to me at ellen.wine@ps150q.org
Week of March 30: Create an abstract color sample inspired by Paul Klee.
1. Watch this YouTube video to see more of Klee's works including some that are not cityscapes. Look at how he uses color. How do these colors make you feel?
2. Watch this YouTube video for one artist's idea on how to experiment with color inspired by Paul Klee.
3. You could print and color this page with any medium of your choice or you could create your own idea Think about what mood you are creating with your color choices. Take a photo of your work and email it to me at ewine@schools.nyc.gov
Week of March 23: Review what we learned in class about Paul Klee and his abstract cityscape paintings.
1. Read the Paul Klee painting handout and look at the pictures and information on the Power Point.
Can also watch this short YouTube video to learn about Klee and his life.
Write a paragraph to explain what you know about Paul Klee and his abstract cityscape paintings. You may type your paragraph on Google Docs and share with Mrs. Wine. Or you may write your paragraph on loose leaf. Take a photo of your paragraph on loose leaf (with a smartphone) and email to Mrs. Wine at ewine@schools.nyc.gov
In Class Activities and Enrichment
Fifth grade students are studying the cityscapes of abstract artist Paul Klee. Students are working from observation to create an abstract drawing of New York City. Then students will experiment with different watercolor techniques and different color schemes. Finally students will add watercolor paint to their abstract cityscape drawing. Look below for home link options that you can do together as a family or that students can do on their own. Submit work to Mrs. Wine by the end of the unit to earn extra credit.
If you want a preview of what we will be doing in class each week check out the daily learning activity Power Point here!!
Home Link Option 1: View Power Point from class.
Sit together as a family and look at this power point. Students should be able to explain the basic concepts of Paul Klee's abstract cityscapes that we have discussed in class. Answer one of the questions from the presentation in a complete paragraph. Place your name and class on top of the sheet with the paragraph and submit it to Mrs. Wine in class. OR....you may type your answer and send it to Mrs. Wine at ewine@schools.nyc.gov. Make sure to include your name and class on emailed response.
Klee did not always work in an abstract style. As you saw in the Power Point, he began his studies by creating art that was realistic. Drawing realistically is is one way to study the subject you are drawing. Find a picture of New York City. It could be the skyline or a neighborhood scene. Draw what you see as realistic as you can. Work on getting the sizes and details correct. Place your name and class on the back of this drawing and submit it to Mrs. Wine in class for extra credit.


Home Link Option 3: Exploring Paul Klee's work. Watch this short (under 5 minutes) YouTube video and explore some more of Paul Klee's works. We studied his abstract cityscapes in this project, but remember he created over 10,000 different pieces of art in his lifetime.
Create your own Paul Klee inspired artwork. It could be a cityscape, a landscape, a person, or complete abstraction. Think about what medium (material) you want to use. It could be a drawing or a painting. Think about what kinds of lines and shapes you will use. Think about how your use of color will impact the mood of your work. Write your name on the back of your work and bring it to Mrs. Wine in class. You could also take a photo of your artwork (with a smartphone) and email it to Mrs. Wine at ewine@schools.nyc.gov
EARLIER THIS YEAR...
Cubist Inspired Sculptures
Class 5-409


Students in class 5-409 looked at two different options they could choose as a sculptural response to Cubism. They read about the life of American artist Joseph Cornell and his box assemblages. They also looked at a Cubist guitar created by Pablo Picasso. Students selected either a box sculpture or cardboard guitar/violin sculpture. Students also decided whether they wanted to work with a partner or by themselves. Boxes and large pieces of cardboard will be provided. Students are asked to bring items from home to enhance their sculptures. They were encouraged to look for items in their own rooms, throughout their home (with parent permission), thrift stores, dollar stores, and more. If parents have questions about the items they should be collecting please contact Mrs. Wine at ewine@schools.nyc.gov
Home Option: Review the Power Point we examined in class. Look at they types of objects Cornell used and how he organized him in his boxes. Think about what materials you might use to cover the surface of your box (papers and/or fabric) and where you might find them. Think about what types of objects you could use to create your sculpture response to Cubism. Bring the materials you find to class. OR Bring in cardboard and other materials needed to create a 3-D Cubist style guitar or violin.
Silhouette Cityscape Paintings
Classes 5-402 and 5-403
Fifth grade students are studying cityscapes in art. Students will learn how to blend tints of tempera paint colors to create a gradation of color for the background. Then they will use black and white tempera paint to create a silhouette painting using New York City as their theme. Students are encouraged to find their own image of New York City as the inspiration for their painting. Extra credit opportunities to extend students' knowledge are listed below!!!
Extra Credit work may be submitted on paper in class or via email to ewine@schools.nyc.gov All work must include your name and class.
Option 1: Use the Power Point to Compare and Contrast Photos with Paintings
Click the link below to view the Power Point we viewed in class. Closely examine the photograph and painting on slide 15.
Write a paragraph to compare and contrast the photo and painting on this slide. Use the questions on this slide to help you reflect on the topic and complete your response. Use art vocabulary.
Option 2: Looking at Other Cityscape Silhouettes
There are many ways to create silhouettes of New York City. Look at the examples of the different artworks below. Which one is your favorite and why do you like it? How do you think the artist made it? Write your answers and make sure you use art vocabulary.


Option 3: Creating a Traditional Silhouette
The traditional portrait silhouette became popular during the late 18th century. Artists would cut a profile (side view) portrait of a person on black card stock. Portraits were then mounted on a pale or white background. The traditional silhouette portrait artist could cut the image free-hand (without drawing it first) and quickly (within a few minutes). This style of artwork originally developed as a cheap alternative to the "portrait miniature," a small painted portrait.

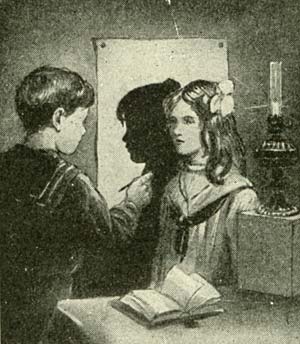

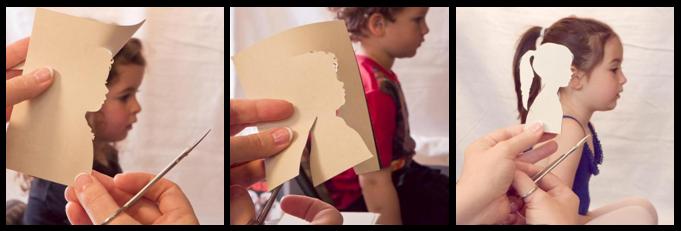
Try creating a silhouette portrait of your own. You can create a self-portrait or portrait of someone else. You do not have to do it in the traditional free-hand style. You might begin by cutting out a profile picture and tracing it on black paper before cutting out the final silhouette. You could also try tracing the shadow of someone else's profile on black paper and then cutting it out. Mount your silhouette on white or colored paper. Place your name and class on the back of your artwork before submitting it.
Cubist Collage

Students in class 5 - 401 and 5 - 409 are creating collages in the Cubist style inspired by Spanish artist Pablo Picasso. Students will learn about the development of Cubism and examine how this style influenced art in the 20th Century. Students will finish drawings of musical instruments from observation. Students will have the choice to create a collage in a neutral color scheme or with a more colorful palate. Additional challenge options in this project include using instruments other than string instruments as the main focus or combining both string and other instruments into one composition. Look below for homework assignments and for extra credit opportunities to extend and enrich your understanding of Cubism and collage techniques.
Homework: Due Wednesday, October 30!!!
1. Look at the Power Point below on the development of Cubism. Read the information on each slide and examine the images carefully. Choose one question from one of the slides and answer it in a complete paragraph. You may write your answer on loose leaf or type it into Google Docs and email it to me at ewine@schools.nyc.gov . Homework is due no later than Wednesday, October 30. The written response rubric will be used to assess your work.
Power Point: Cubism and the Still Life
Rubric: Written Response Rubric
2. Look ahead to see the specific steps of the project by viewing the next Power Point. Pay close attention to the student examples at the end of the Power Point. Think about which option you might want to choose for your collage.
Power Point: Cubist Collage Steps

Extra Credit Option 1: Look at the examples of these projects from previous years. Examine how these student artists used the same instrument to create both a realistic drawing and an abstract Cubist collage. Write a paragraph to compare and contrast two of these works. Make sure to describe them in a way that makes it easy for me to understand which pair of works you are looking at.


Andy Warhol Inspired Drawing Series
Drawing with Stencils
5-402 and 5-403
5-402 and 5-403

Fifth grade students in classes 5-402 and 5-403 are studying the works of Pop Artist Andy Warhol. Students examined a variety of Warhol's works to discover how he created unity by repeating images and colors in his screen prints. They also discussed how he treated images of celebrities in a similar way to that of objects that were massed produced.

For this project, we are borrowing the theme from Warhol's book, Yum, Yum, Yum. Students are working from observation to create an original stencil of a dessert or popular food items. Stencils will be repeated three or four times in the style of Warhol's screen prints. Students will use neon pastels to add color to their drawing, repeating colors to create unity in their work.
Look below for home link options that you can do together as a family or that students can do on their own. Submit work to Mrs. Wine by the end of the unit to earn extra credit.
Option 1: View the Power Point we discussed in class. As a family, discuss what you see in Warhol's work. Use the questions on the slides to guide you. Write a paragraph to discuss something you have learned about Andy Warhol's work. Place your name and class on your paper and submit it to Mrs. Wine in class.
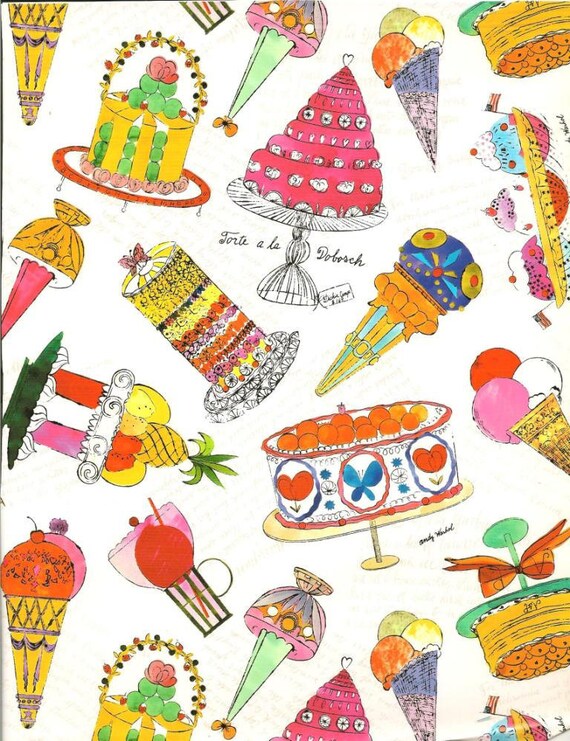

Option 2: Look at the images of desserts by Warhol. Create a contour drawing of your favorite dessert. Work from observation. Find a picture of a dessert in a magazine or online. Even better...draw from a real dessert! (Then you can eat it when you finish the drawing!!!!) Use a pencil, black pen, or Sharpie to create your contour drawing. Add color in the style of Warhol using marker, colored pencil, or crayon. Place your name and class on the back of your drawing and submit it to Mrs. Wine in class.
Option 3: Wayne Thiebaud is another artist who is well known for his artworks using dessert as a theme. He is an American painter who was born in 1920 and grew up in California. Look at some examples of his works. Write a paragraph to compare and contrast Thiebaud's works to those of Warhol. Make sure you write your name and class number on your paper. Submit it to Mrs. Wine in class.


/https://public-media.smithsonianmag.com/filer/thiebaud-cakes-631.jpg)

Option 4: Photography!! Andy Warhol was one of the first artists to use photography at a fine art. He often repeated the same photos with different colors or even different photos of similar poses. Use your camera to experiment with changing the colors of photos. Take a selfie or portrait of someone and save it with at least 4 different color filters. Send the photos to me as attachments in an email (ewine@schools.nyc.gov) or print them, cut them out, and glue them to a piece of paper and turn them in. Think about how you could cut them out creatively!! They don't have to be squares!! You could even combine several photos in one picture.

Here is an example by local artist Virginia Asman to inspire you. Ms. Asman was born in New York state, grew up in New Jersey, and moved to NYC in 1995. She describes her art as a fusion or combination of fine arts and graphic arts. Ms. Asman is currently living in New Mexico.

Art Expo Fifth Grade


Chihuly Inspired Collage
Class 5 - 401

Dale Chihuly is an American glass artist who is well known for his installations of blown glass sculptures. Many of his works are inspired by the organic forms in the environment surrounding his works. Students in class 5 - 401 will be working either collaboratively or independently to create their own Chihuly inspired works. Look below to learn more about Chihuly. and his unique glass sculptures.
Homework: Look at the Power Point e viewed in class. Choose 1 question from the Power Point slides to answer. Write your response in a full paragraph. You may write your response on loose leaf and submit it in class. Or, you may type your response on a computer and submit it to Mrs. Wine at ewine@schools.nyc.gov. Deadline to submit homework is May 14.

Extra Credit Option 1: Sketching Your Ideas
Draw a plan for your Chihuly inspired sculpture. Add color to show your plan for both color and pattern. You may make notes (label) on your sculpture to help explain what inspired you. What aspects are taken from organic shapes and forms found in nature? What aspects are inspired directly from Chihuly's works.
Extra Credit Option 2: Compare and Conrast
View the video we looked at in class that discusses Chihuly's process. View the other video which demonstrates traditional glass blowing for functional (useful) purposes. Compare and contrast both the process of glass blowing shown in both videos as well as compare and contrast the glass blown products. Submit responses in writing either on loose leaf in class or by typing on your computer and submitting via email to ewine@schools.nyc.gov.
Logo Design
Class 5 - 409

Students in class 5-409 are working on a logo design unit. They learned about the development of logos throughout history. They looked at a variety of modern logos to discover how quickly simple logos can be recognized and communicate a message. Students will design an original logo for a local business or organization. Look below for extra credit opportunities to enhance and extend your knowledge of logos.
Option 1: Look at Logo Power Point
Look back at the Power Point presentation that we discussed in class. Chose your favorite logo from the presentation. Write a short paragraph to explain why you think it is an effective logo. Choose another logo that you think is not that effective. Write another short paragraph to explain why you think this logo is not effective. Give suggestions to change or improve this logo to make it more effective. Remember, an effective logo should be simple and be able to communicate the identity of the business or organization quickly. You may write your response on loose leaf and submit it in class, or you may type it and submit it online to ewine@schools.nyc.gov
Option 2: Create a Personal Logo
Use your initials to create a personal logo. Think about how you could create an original letter style that would connect your initials. Think about how you could include a simple symbol to represent something about yourself. Think about what colors would best represent you. Draw you logo big enough to fill a sheet of copy paper. Color the logo with crayon, marker, or colored pencil. Write your name and class on the back of the paper and submit it to Mrs. Wine in class.
Option 3: Create a Coat of Arms
Create a coat of arms for your family. Think about the designs you can use to make the coat of arms interesting. Think about an animal that could represent something about your family. Could you include a motto or saying that would describe your family? Draw the coat of arms on a sheet of copy paper. Make it large enough to fill the paper. Add color with crayon, marker, or colored pencil. Limit yourself to 3 - 4 colors.


Silhouette Collage
Class 5 - 401

Students in class 5-401 learned about the history of silhouettes in art. They looked at how silhouettes have been used in contemporary artworks to show figures in active poses. In this unit, students select a photo of a person in action. Sports and fashion photos usually make good choices. Background color choices will be made to enhance the mood of the figure and collaged in tissue paper. Finally, silhouettes will be cut from black paper and added to the collage. Look below for extra credit opportunities to enhance and extend learning with this unit.


Option 1: Look at Silhouette Collage Power Point
Look at the Power Point that we viewed in class. Select one of the questions from one of the slides and answer it in a complete paragraph. You may submit your response on loose leaf by giving it to Mrs. Wine in class, or you may type your answer and submit it via email at ewine@schools.nyc.gov . Make sure your your name and class is on your response.
Option 2: Create an Artwork with Your Silhouette Photo
Bring home the photo that you used to create your silhouette collage. Use this photo to create another artwork. Here are some ideas to try:
- Draw an original background for your photo and glue the photo on top of the background.
- Trace the photo on different colors of paper. Cut out these different colors of silhouettes. Glue them onto a paper to create a colorful collage.
Option 3: Gym Mural
Look at the photos below of the silhouette mural that is currently painted in our gymnasium. Pretend this class has been asked to create a new mural for the gym using silhouettes. Draw your idea for the new mural that uses silhouettes. Write a short persuasive statement to explain why you think this idea should be chosen.


Option 4: Silhouette Cityscape Option
Look at the three options for the Silhouette Cityscape Painting Unit (See Below). Choose one of these options to complete.
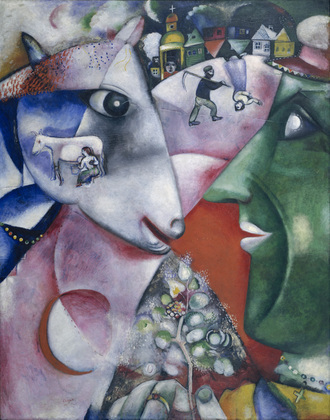
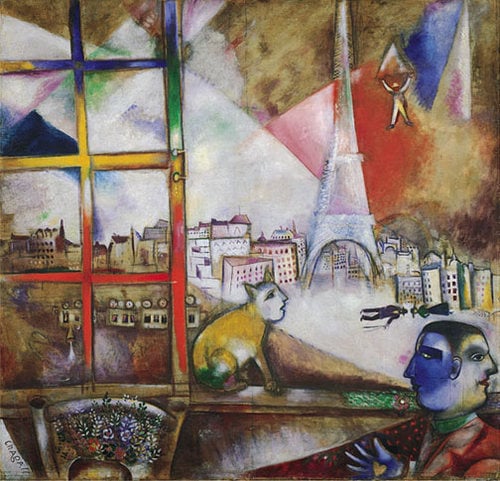
Fifth grade students are studying the art of Surrealist Russian painter Marc Chagall. Students looked at a variety of paintings by Chagall to develop a list of characteristics of his works.Students will be challenged in this project to create their own unique drawing using their own personal memories, dreams, and stories from their cultures. The elements of art including line, shape, value, and color will help students create emphasis and balance in their compositions.
Look at the options below and choose one to complete for extra credit.
Option 1: Review the Power Point presentation. Students should be able to review the artworks on these slides and explain the main characteristics of Chagall's work. To earn extra credit students either need to answer two questions from the slides or complete the creative writing piece where they are asked to write a story to go along with one of the paintings. Students are reminded to place their name and class on their responses. Written responses may be submitted to Mrs. Wine on loose leaf in class or emailed to her at ewine@schools.nyc.gov
Marc Chagall Power Point
Option 2: Examine the works by these other Surrealist painters, Salvador Dali and Rene Magritte.
Mae West by Salvador Dali

The Son of Man by Rene Magritte
Compare these two Surrealist paintings to the works of Marc Chagall. What common features to they all have that you think makes them a part of the Surrealist style. Write your response in a paragraph and submit it to Mrs. Wine to earn bonus points toward your art grade. Do not forget to write your name and class on your response. You may write your response on loose leaf and give it to Mrs. Wine in class or email it to ewine@schools.nyc.gov
Option 3: Create an extra Surrealist style drawing on your own. Please draw on unlined paper. (Copy paper is fine.) You may work together as a family, or students can complete the drawing on their own. Add color using the material of your choice. Make sure you are using personal memories, dreams or stories from your culture to develop your ideas. Use the elements of art to emphasize the most important objects in your drawing. Place your name and class on the back of your drawing. Submit your drawing to Mrs. Wine in class to earn extra credit points for your art grade.

Painting by Marc Chagall
This is pretty nice of a drawing.
ReplyDeleteWhich of these on the page is your favorite? Why do you like it? I am always curious to find out what inspires my students!!
ReplyDeleteMrs. Wine - I'm trying to make up my missing Pablo Picasso assignments, I was wondering what the deadline was for these projects, and how I would be able to get them to you in time. You can reach me at the following email adress: miles.lehoczki@ps150q.org. Thank you in advance.
ReplyDeletehello. i am confused on how to get to the power point, i can not find it
ReplyDeletenever mind
ReplyDeleteThis comment has been removed by a blog administrator.
ReplyDelete